
Version 3.0 - Legacy
Last: Vers. 5.9 - 2022
- Developers' Guide
- Introduction
- Administrator's Guide
- Connecting to Everyware Cloud
- REST APIs
- Supplementary Documentation


PART 5. SUPPLEMENTARY DOCUMENTATION
Setting up Eclipse Environment for Java
· Download Eurotech Cloud Example Code
· Install Java Development Kit (JDK)
Overview
This section will provide a step-by-step process for installing the Eclipse IDE, which will be used to simulate an MQTT client device and to test programmatic access to the data store using REST APIs. Eclipse is an open source development tool that consists of an integrated development environment (IDE) and a plug-in system for managing extensions. This document will walk through installing Eclipse, obtaining updates/plug-ins/tools, and setting up the environment.
We will also use Maven, which is a build automation tool for Java projects. Maven will automatically download the Eurotech Cloud example code from GitHub and resolve dependencies in the sample applications described in this Developer’s Guide.
Installing Eclipse
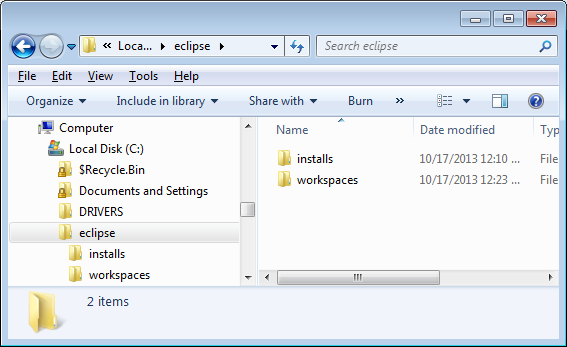
Before installing Eclipse, directories should be created on the installation machine for Eclipse installations, as well as project workspaces. The ‘eclipse’ directory is typically at the root directory (C:\ on a Windows machine or / on a Linux machine). This procedure will use a base directory called “eclipse”. Under this, two more directories will be created and named “installs” and “workspaces.” The location of these directories should be chosen carefully, because they should not be moved after being created.
Note: It is very important to recognize a few things before getting started with Eclipse.
· Once Eclipse is installed and workspaces are created, they can never be moved to another location in the file system.
· There may be multiple installs (of different or similar versions) of Eclipse in the “C:\eclipse\installs\” directory, and single instances of each install can be run simultaneously, but there should never be more that one instance of a specific install running at the same time (to avoid corruption to the Eclipse environment).
· Also, each version of Eclipse may work slightly differently, and each install may have different tool sets configured. Therefore, each workspace should be specific to only one Eclipse install. For the purposes of this guide, only a single Eclipse installation will be covered.
The current distribution of Eclipse can be downloaded from the Eclipse website at http://www.eclipse.org/downloads/.
Note: These instructions show the installation of Eclipse Kepler (version 4.3.x). Newer versions of Eclipse may be available.
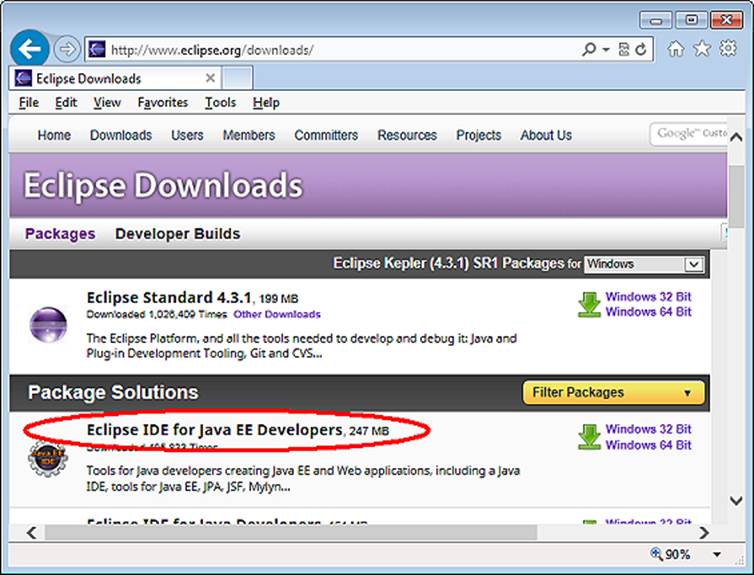
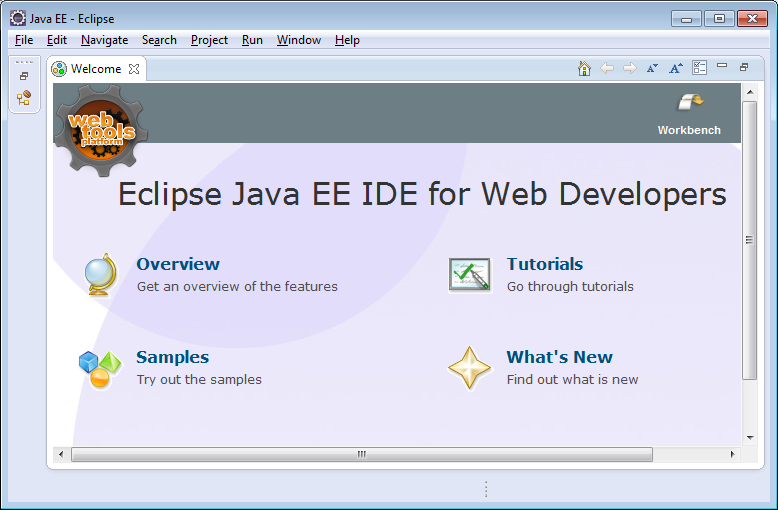
The specific Eclipse package we will use for the examples in this documentation is called “Eclipse IDE for Java EE Developers” and contains the essential tools for Java development (shown in the figure below).
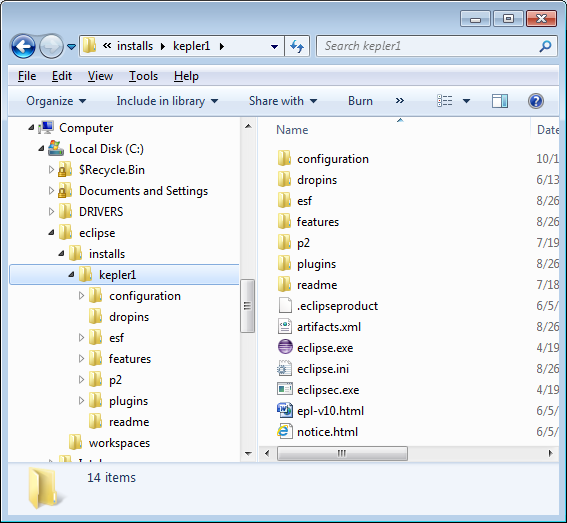
The zipped Eclipse file will be downloaded to the local file system (this can be saved to a temporary location, which can be deleted after Eclipse has been installed). After the file has been downloaded, it should be extracted to the “C:\eclipse\installs\” directory. The Eclipse executable will then be found in the “C:\eclipse\installs\eclipse\” directory.
Because there may potentially be future Eclipse installs extracted into this location, it is recommended to rename the directory before doing anything else, such as “C:\eclipse\installs\kepler1\”. Once you begin using this Eclipse install, it should not be moved or renamed later. You can also create a “kepler1” directory under “C:\eclipse\workspaces\” to hold the workspaces created using this install. This method of organization is not required, but is merely suggested here as one means of organizing installs and workspaces.
Creating a Workspace
Start Eclipse by double-clicking on the eclipse.exe (or eclipse on Linux) executable, in the “C:\eclipse\installs\kepler1\” directory (or whatever you renamed it to).
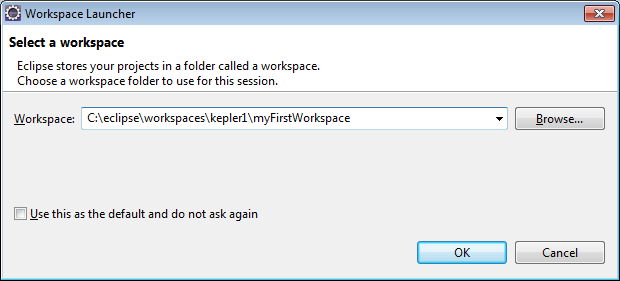
When Eclipse is run for the first time, a workspace needs to be created. A single workspace will contain all the Java code, projects, bundles, Eclipse configuration parameters, and other relevant files for a specific business-level project. If the “Use this as the default” option is checked, the workspace will become the default each time you run Eclipse. When a new workspace is needed, select the Eclipse menu File->Switch Workspace->Other to create one as previously described, or a past workspace can be selected.
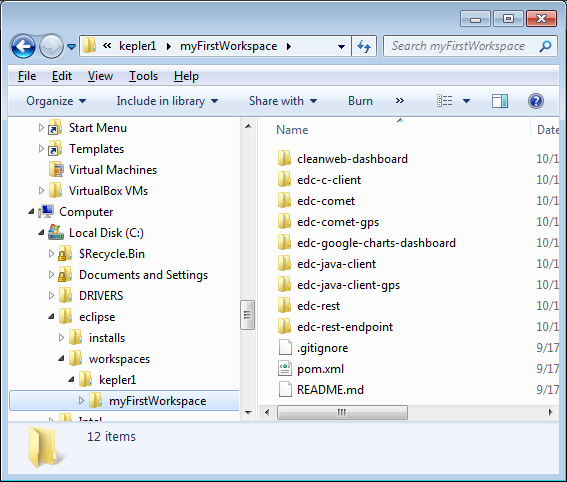
Browse to the workspaces directory created above, and create a new workspace such as “C:\eclipse\workspaces\kepler1\myFirstWorkspace”.
Within each workspace one or more “projects” can be created. Used in this sense, the term “project” refers to individual Java projects (or “bundles”) contained within that workspace; as distinguished from a business-level “project” that might contain many Java projects/bundles.
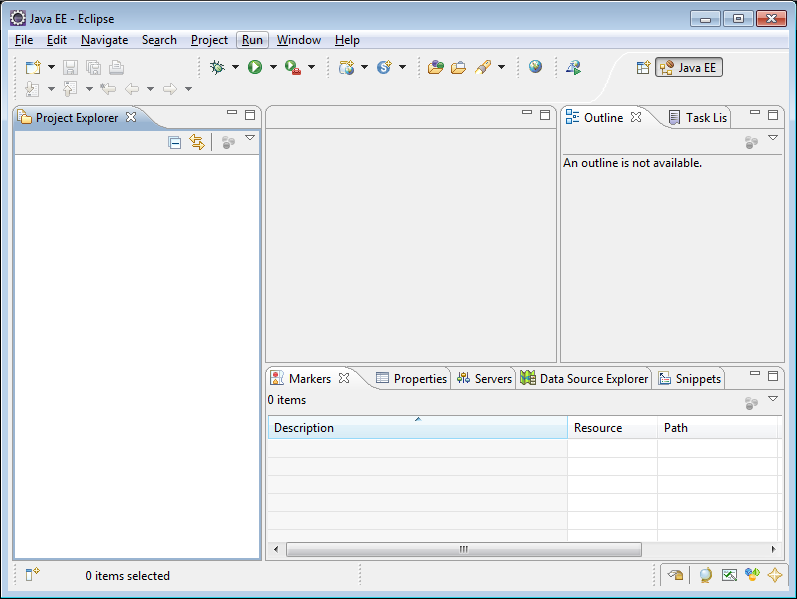
After Eclipse opens to the Welcome screen, you can click on the “Workbench” icon to view the empty Eclipse workspace.
Install Maven 2 Eclipse Plug-in
The “m2e” plug-in adds Maven integration into Eclipse. The “m2e” plug-in should already be included in the Kepler Eclipse Java for EE developers installation, but will need to be added if you are using an earlier version of Eclipse. To install “m2e”, select Help | Install New Software. Click Add to add a new software location, and enter one of the following URLs (depending on which version of Eclipse you have installed):
http://download.eclipse.org/releases/indigo
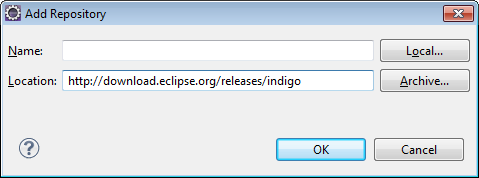
Under “General Purpose Tools”, select the checkbox next to “m2e - Maven Integration for Eclipse”, and click Next. Click through the next few menus to accept the license agreement and install the plug-in. After the installation is complete, restart Eclipse.

Set up Working Sets
Working Sets can be used in Eclipse to simplify the view in the Package Explorer. This does nothing other than change how the elements are viewed in the Package Explorer. When working with a lot of projects, it can greatly simplify the view.
If the Package Explorer window isn’t visible, select it from Window | Show View | Other | Java | Package Explorer.
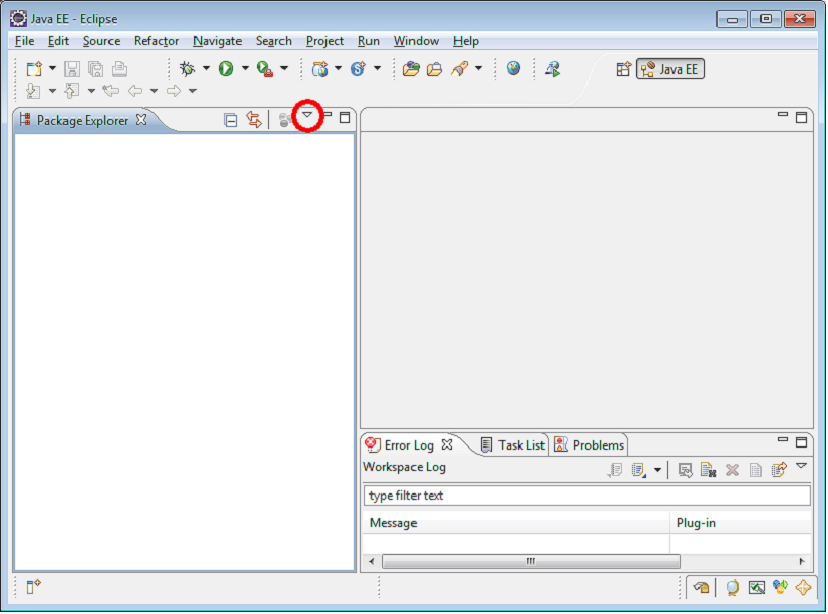
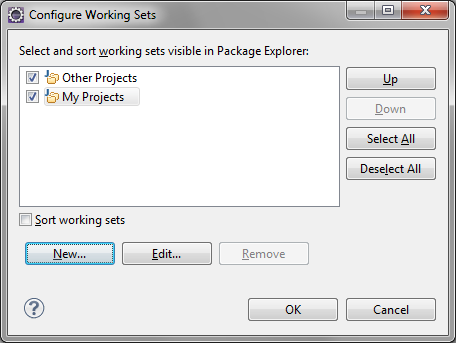
In the Package Explorer view, click the arrow shown in the figure below and selecting ‘Top Level Elements -> Working Sets’.
This will bring up the Configure Working Sets window. Click the New button, and add a working set called “My Projects”. You can also create other working sets, or remove the “Other Projects” set created by default. Then click OK.
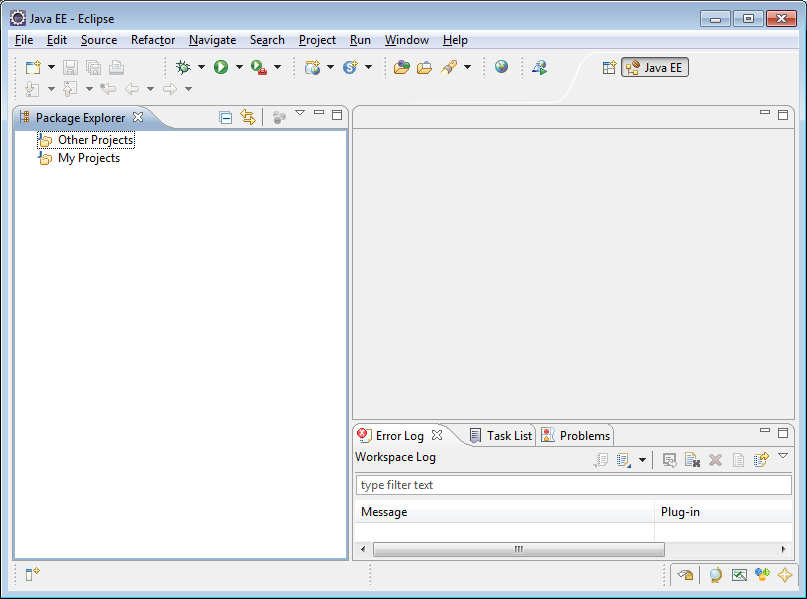
The Package Explorer Window now shows the working set(s). Projects that you create or import into the Workspace can be moved into these working sets in order to arrange them. Working set contents can be expanded or contracted by clicking on the + or – icon, after projects have been added to the set.
Other Components
Eclipse supports many additional open source and proprietary plug-ins that can be installed and used. These include features like SVN/GitHub support, code development and integration tools, etc. These are beyond the scope of this tutorial.
GitHub Repository
The Everyware Cloud example code is hosted on GitHub, a public software repository that is used to distribute code, manage projects, and collaborate with other software developers.
Close the Eclipse program before proceeding with the following steps.
Download Eurotech Cloud Example Code
Browse to the Eurotech “edc-examples” GitHub repository at https://github.com/eurotech/edc-examples/. Click on the Download ZIP button to download the sample Cloud applications as a Zip file.

Inside the Zip file, there will be a pom.xml and several example project directories. Extract these from the Zip file into the workspace directory that you created earlier. (Note: After using the projects in Eclipse, if you later download the project files again, you should create a new, clean workspace rather than extracting into an existing one.)
Installing Maven
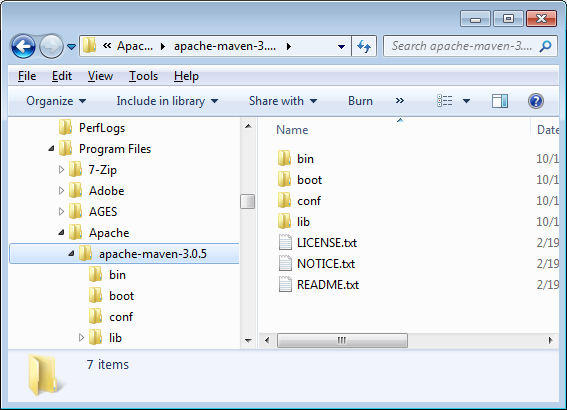
Download the 3.0.5 version of the Maven build automation tool (binary zip or tar.gz) at http://maven.apache.org/download.html (not the latest 3.1.x version).
Create a folder named “Apache” (or similar) under the Program Files location, and unzip the contents of the Maven distribution into this folder. In Windows, this should result in a program location something like “C:\Program Files\Apache\apache-maven-3.0.5”.
Install Java Development Kit (JDK)
To use Maven, you will also need to install a Java Development Kit. See http://www.oracle.com/technetwork/java/javase/downloads/index.html to download the Java SE 7 JDK. Installation instructions are included on the download site, and are not reproduced here.
Set up System Variables
The operating system needs to have several system or environment variables set in order to use Maven. See the Maven installation instructions at http://maven.apache.org/download.html#Installation for more details on setting up Maven.
Windows: Select System from the Control Panel window, open the Advanced system settings, and click on the Environment Variables button.
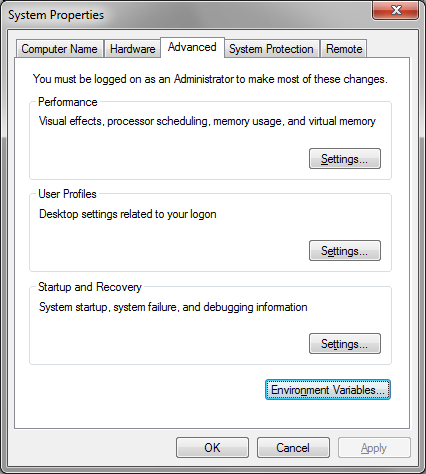
The following system variables need to be configured for Windows:
|
Variable |
Set to: |
|
M2_HOME |
Maven installation directory (such as C:\Program Files\Apache\apache-maven-3.0.5) |
|
M2: |
%M2_HOME%\bin |
|
JAVA_HOME |
JDK installation directory (such as C:\Program Files\Java\jdk1.7.0_45) |
|
PATH |
Add to the PATH variable (separate with semi-colons): %M2%;%JAVA_HOME%\bin |
Linux: Extract the file to a directory such as /usr/local/apache-maven. Use the ‘export’ command to set the environment variables, such as:
#set M2_HOME to maven installation directory
export M2_HOME=/usr/local/apache-maven/apache-maven-3.0.5
export M2=$M2_HOME/bin
#set JAVA_HOME to JDK installation directory
export JAVA_HOME=/usr/java/jdk1.7.0_45
Add Maven to the PATH variable (also the Java JDK, if it isn’t already in the path after installation):
export PATH=$M2:$PATH
export PATH=$JAVA_HOME/bin:$PATH
Test Maven
After setting these paths, open a command prompt window and execute the Maven command “mvn --version” to make sure that it runs. If not, double-check the Maven and JDK installations and the system variables.
> mvn --version
Apache Maven 3.0.5 (r01de14724cdef164cd33c7c8c2fe155faf9602da; 2013-02-19 07:51:28-0600)
Maven home: C:\Program Files\Apache\apache-maven-3.0.5
Java version: 1.7.0_45, vendor: Oracle Corporation
Java home: C:\Program Files\Java\jdk1.7.0_45\jre
Default locale: en_US, platform encoding: Cp1252
OS name: "windows 7", version: "6.1", arch: "x86", family: "windows"
Resolve Dependencies
Change directory to the Eclipse workspace folder created earlier (such as “C:\eclipse\workspaces\kepler1\myFirstWorkspace”), then execute the following Maven commands. This will resolve the project dependencies and set up the projects for use in Eclipse (make sure you have Internet access before running the commands).
mvn clean install
mvn eclipse:clean eclipse:eclipse
These commands may take a few minutes to run, and they should each end with SUCCESS messages.
Finally, issue the following command to tell Eclipse what is the location of the Maven repository, where <path-to-eclipse-workspace> is the location of the Eclipse workspace folder.
mvn -Declipse.workspace=<path-to-eclipse-workspace> eclipse:add-maven-repo
This command will only show SUCCESS for the main “edc-examples” project.
For more information on using Eclipse with Maven, see http://maven.apache.org/guides/mini/guide-ide-eclipse.html.
You are now ready to use Eclipse with the sample Java applications for the Everyware Cloud. See the following sections to install and run a sample Java application that will connect to the Cloud:
· Connecting to the Cloud in Java